Creating Textures in Photoshop
 Over the past few weeks we have been focusing on the basic 3D modeling workflow for creating game ready 3D art assets. One of the most important elements that we, as game artists, need to create are UV Maps. As discussed last week, UV Maps allow us to accurately place texture images on our 3D models. Its a laborious process that requires a tremendous attention to detail, effort and persistence. At the conclusion of the UV Mapping stage, however, we'll have a series of UV islands that we can now interactive paint on.
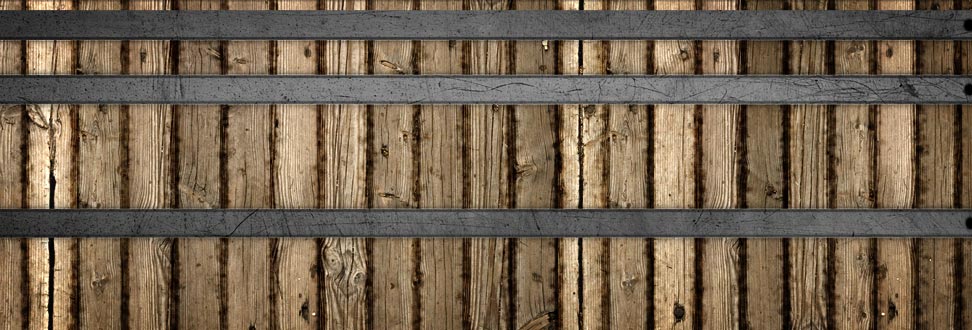
 As 3D artists, we are constantly looking for the right tool to preform the right job. Modo is the perfect tool for generating the 3D geometry and UV Maps for our models, but Photoshop continues to be the stronger application for painting 2D texture maps. In addition to the extremely strong suite of tools, Photoshop embodies a creative workflow that is necessary for painting textures. Here, we can combine, manipulate and edit 2D bitmaps images with ease. Painting high resolution detail, like grime and dirt, is made easy with the powerful brush system in Photoshop. In many ways, Photoshop is the perfect tool for creating 2D textures for our 3D models.
Lets explore the interactive painting and image manipulation suite of tools in Photoshop. This week we'll take a look at how to bridge Modo and Photoshop by exporting our UV Maps from Modo and getting them into Photoshop correctly. Our conversation will focus on the basic workflow of creating 2D images in Photoshop and explore the tools we'll need to make our texture files. We'll wrap up our journey inside of Photoshop by discussing the process of applying our completed texture maps on our models back in Modo.
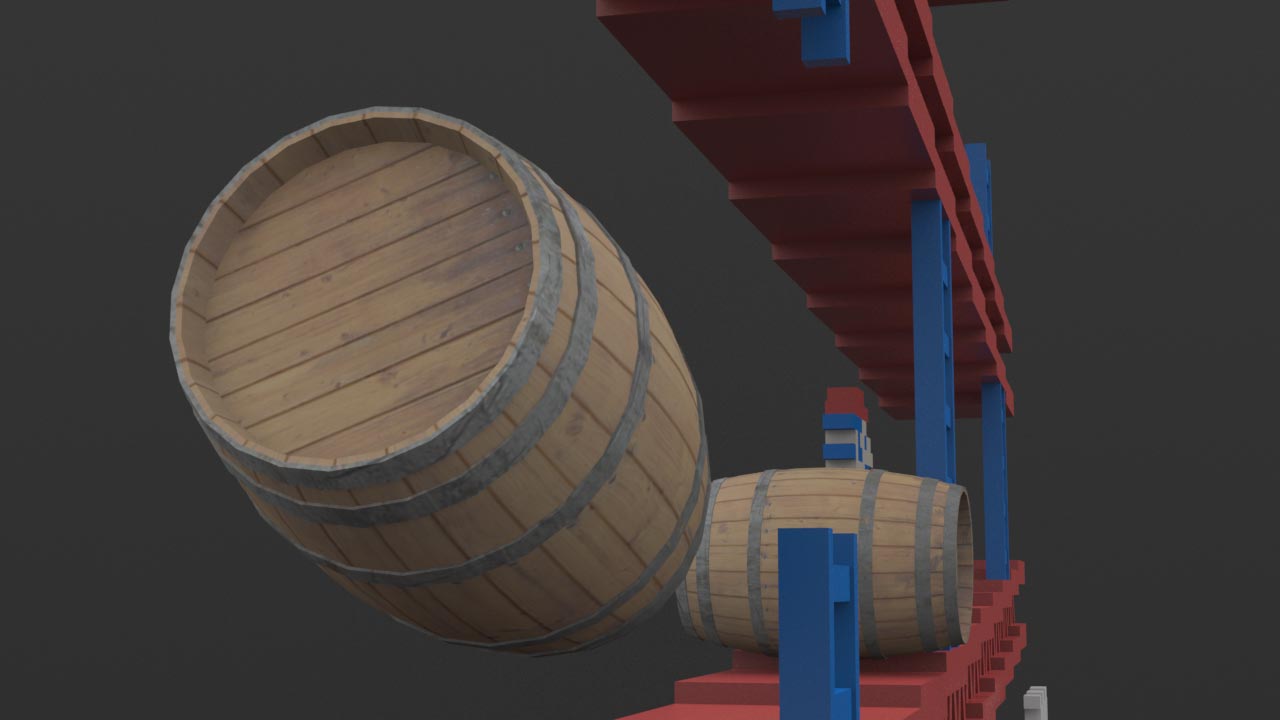
Wine Barrel - Texture (50pts)

Project Due: Week 05
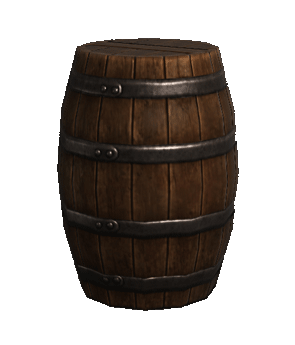
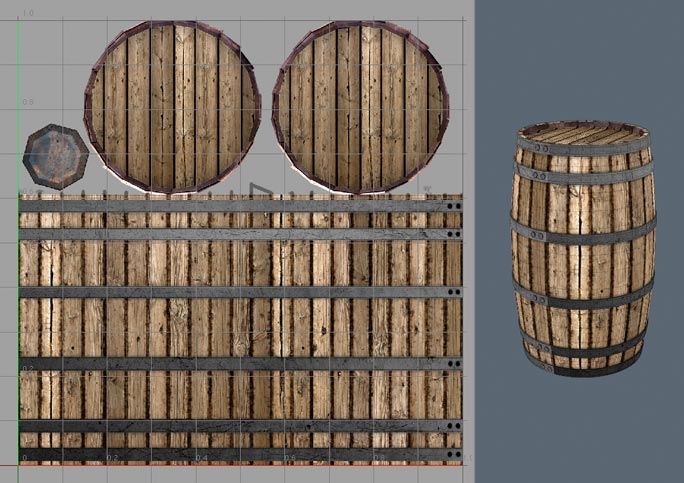
During the first phase of this project you created the surface geometry and UV Maps for your high-resolution wine barrel. In Part 2, you are going to create a Diffuse Texture Map for your model. A great way to understand the role of the Diffuse Texture map is to think of this image as responsible for the color of the surface; kind of like the skin of the model. Good game models include a tremendous amount of detail in the Diffuse texture map. This is where we, as the artists, get to communicate to the audience how this model has been influenced by the environment, weathering and age. Put some thought into how your wine barrel is going to look. Consider adding small details to the surface of your barrel, like dirt and rust. We want our wine barrel to include character so paint details using the layering system in Photoshop.
You'll start off this project by exporting your UV map from Modo. Open up Photoshop and create a new document. Please ensure your create your Photoshop document with a width and height of 1024x1024 pixels and using the RGB color space (no CMYK). In many ways, we're going to be using the UV Maps like we would the outline image in a coloring book. Import your UV map into your new Photoshop Document and begin creating the diffuse texture detail for your wine barrel. Be creative! Examine your reference photos and pull relevant information into your Diffuse texture map. Add the illusion of dirt and grime for character and weathering. Once you are done creating your Diffuse Texture Map in Photoshop, export a PNG of your texture map and apply it to your 3D model in Modo. Make a quick render of your scene and upload to the dropbox on D2L. Please ensure your project includes the following required elements before you complete this assignment:
- Geometry for Wine Barrel
- Geometry for Set (simple scene)
- UV Map for Wine Barrel
- Diffuse Texture Map for Wine Barrel
- Texture Resolution for image map = 1024x1024
- Final Render Frame Size = 1280 x 720 pixels
- Final Render File Type = JPEG
Examples of Successful Projects
Check out these awesome projects! The images below are example of successful student projects. Use the following images to help guide you to your end results. Notice that all of these images include a high degree of detail on the surface of the geometry, accurate materials/textures, and stellar lighting set-ups. In addition, each of these images properly showcase the model, the focal point of the render, by utilizing a good sense of composition and framing. Great work!
All Finished with your Homework?

After you have saved the project file on your personal external storage device (like a thumb drive), please upload your Luxology Scene File (.lxo), the Photoshop Document (.psd) you used to generate your texture, a flattened PNG of your diffuse texture (.png) and your rendered image (.JPEG) to the Wine Barrel - Texture dropbox on D2L.
Before you upload your files to D2L, please ensure your files meet the following naming conventions:
Submit Your Assignment- lastname_gcom_424_wine_barrel_tex.lxo
- lastname_gcom_424_wine_barrel_tex_dif.psd
- lastname_gcom_424_wine_barrel_tex_dif.png
- lastname_gcom_424_wine_barrel_tex.jpeg
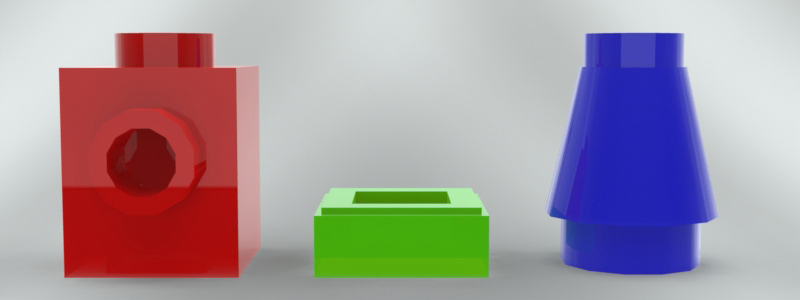
Modo Blocks

Project Due: Week 05
UV Mapping is tough, so we need to practice the process of generating UV islands on different models. Your lab assignment, this week, is to take the supplied model files (found in the resource tab on this page) and generate UV maps for the three models included in the project file. Spend some time projecting and unwrapping the meshes to create UV islands with a little distortion as possible. Remember, the best way to check your UV maps for distortions is to apply the UV Checker Material preset. Once you are done creating the UV maps, make a quick render of your scene and upload to the dropbox on D2L. Please ensure your project includes the following required elements before you complete this assignment:
- UV Map - For Objects 1, 2 and 3
- UV Checker Material Preset applied to all Models
All Finished with your Lab Assignment?
After you have saved the project file on your personal external storage device (like a thumb drive), please upload your Luxology Scene File (.lxo) and your rendered image (.JPEG) to the Modo Blocks dropbox on D2L.
Before you upload your files to D2L, please ensure your files meet the following naming conventions:
Submit Your Assignment- lastname_gcom_424_lab_modo_blocks.lxo
- lastname_gcom_424_lab_modo_blocks.jpeg
Important Documents

Check out these awesome learning resources! I've collected a number of assets that I think will help you conquer this week's homework and laboratory assignment. Please download the following materials to your local hard disk or flash storage device (AKA thumb drive).
Videos

Here are some important videos for this week's learning materials. I've created these videos to help you navigate the instructional content we covered in class. Make sure you add these important assets into your personal learning library by bookmarking them!