Creating Materials and Textures
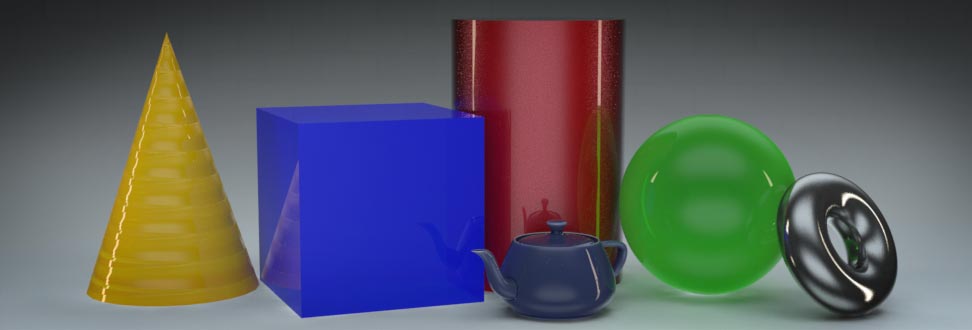
Over the past few weeks we have been exploring the basic 3D modeling tools in Modo. We discussed the role of Vertices, Edges and Polygons and examined how Items are used in the hierarchy of elements in our scene. Up until now, our models have been accompanied by very basic colors (materials), so we really haven't achieved the photorealism we desire. Well, its time to break in to the Shader Tree and dig into the Materials and Texturing system in Modo.
Great 3D models are accompanied by great materials and textures. Mastering the workflow of applying materials to our 3D objects is critical for our success. Bad materials and textures can ruin a fantastic 3D model. To be honest, building the shape of our 3D modeling is just the first step in a long journey towards completion. Once we have modeled the overall shape of our object, we need to start thinking about what the surface characteristics of this object are going to be. What color is our object? How does it reflect or absorb light? Are there any decals or logos on it? This are all great questions to find answers when entering the material and texturing stage of the 3D modeling pipeline.
In Modo, materials and textures are created and manipulated in the Shader Tree. Here, we can change specific properties that will directly influence the surface characteristics of our 3D model when we render our scene. This week we will explore how the Shader Tree operates and discover how to apply textures to the models in our scene.
Cork Board Texture (50pts)

Project Due: Week 06
In the first phase of this two-part project, you created the basic geometry for your cork board. Now, in Part 2, you are going to be applying materials and textures to help establish the surface color and characteristics of your model. In this exercise, you will learn how to use the shader tree, apply materials, change the environment and add image maps to your objects. This lesson covers the basics of texturing and rendering object inside of Modo. Please refer to Chapter 7 in the Unofficial Luxology Modo Guide for specific instructions on how to complete this assignment. Please ensure your project includes the following required elements before you complete this assignment:
- Mesh Item -Cork Board
- Mesh Items - Paper Flyers x5
- Mesh Items - Thumbtacks for all paper flyers/posters
- Separate Materials for all items in the scene
- Texture maps applied to all posters/flyers/postcards
- Global Illumination = On
- Final Render Frame Size = 1280 x 720 pixels
- Final Render File Type = JPEG
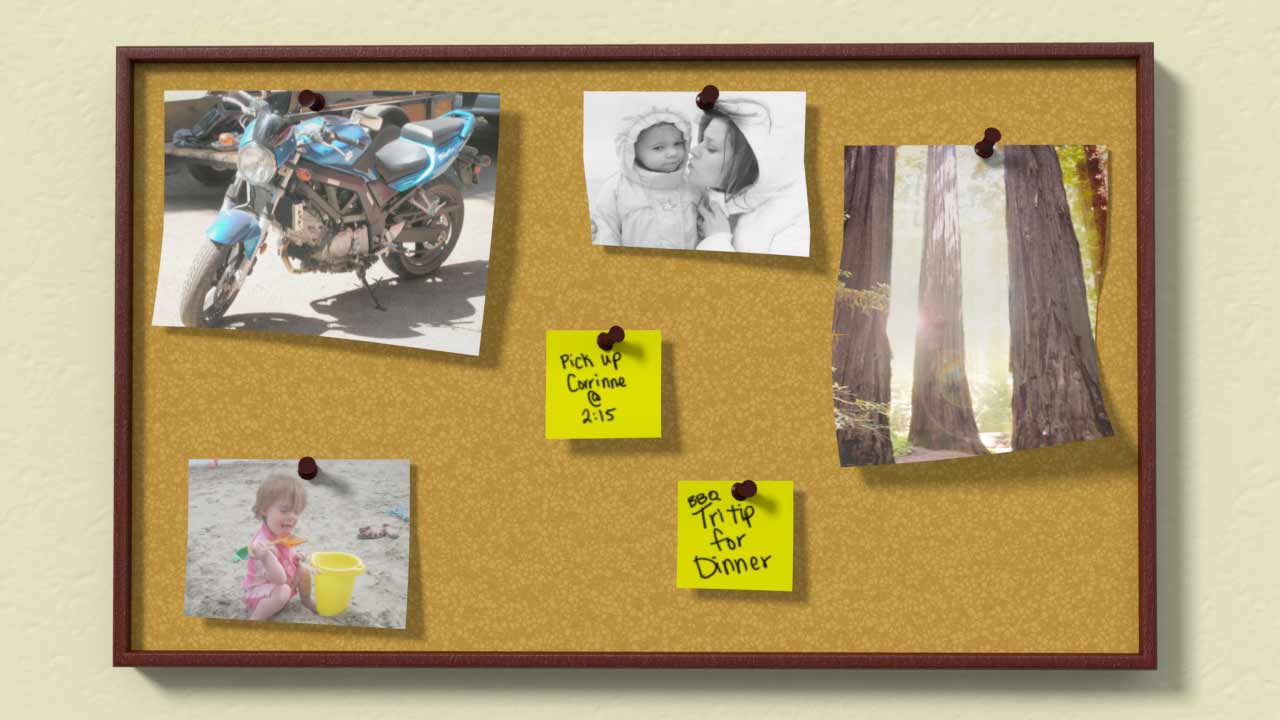
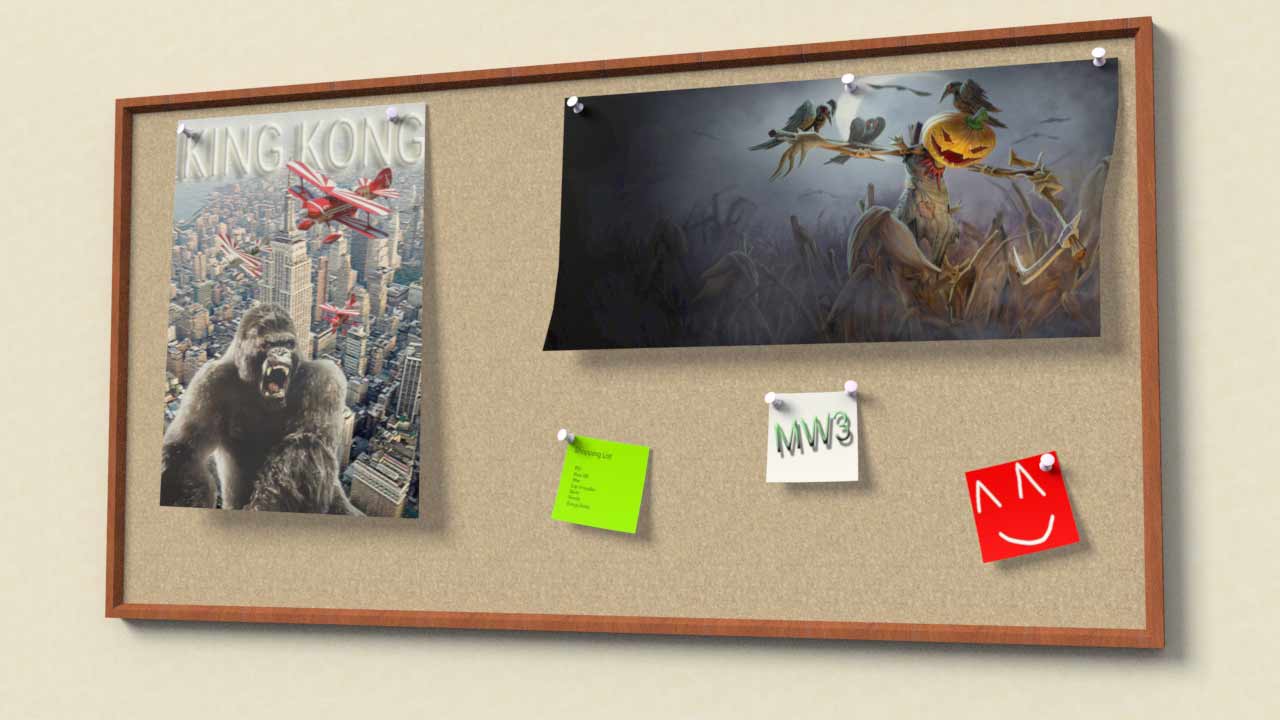
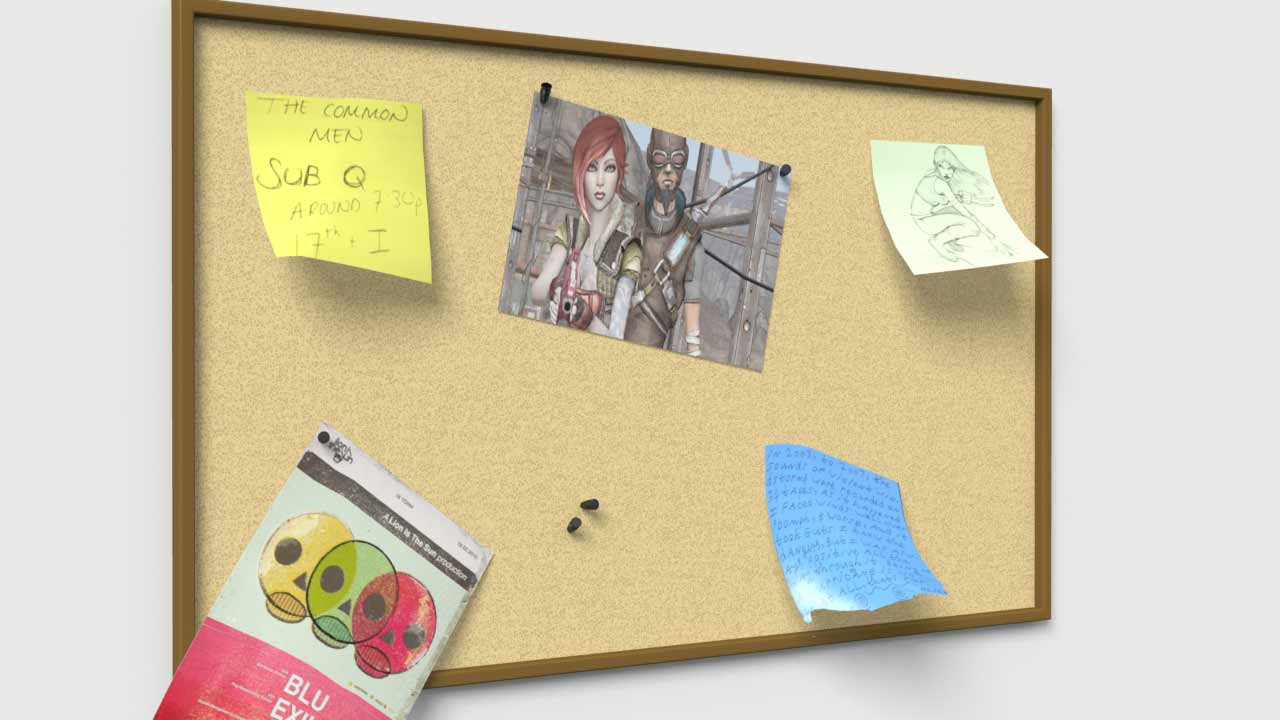
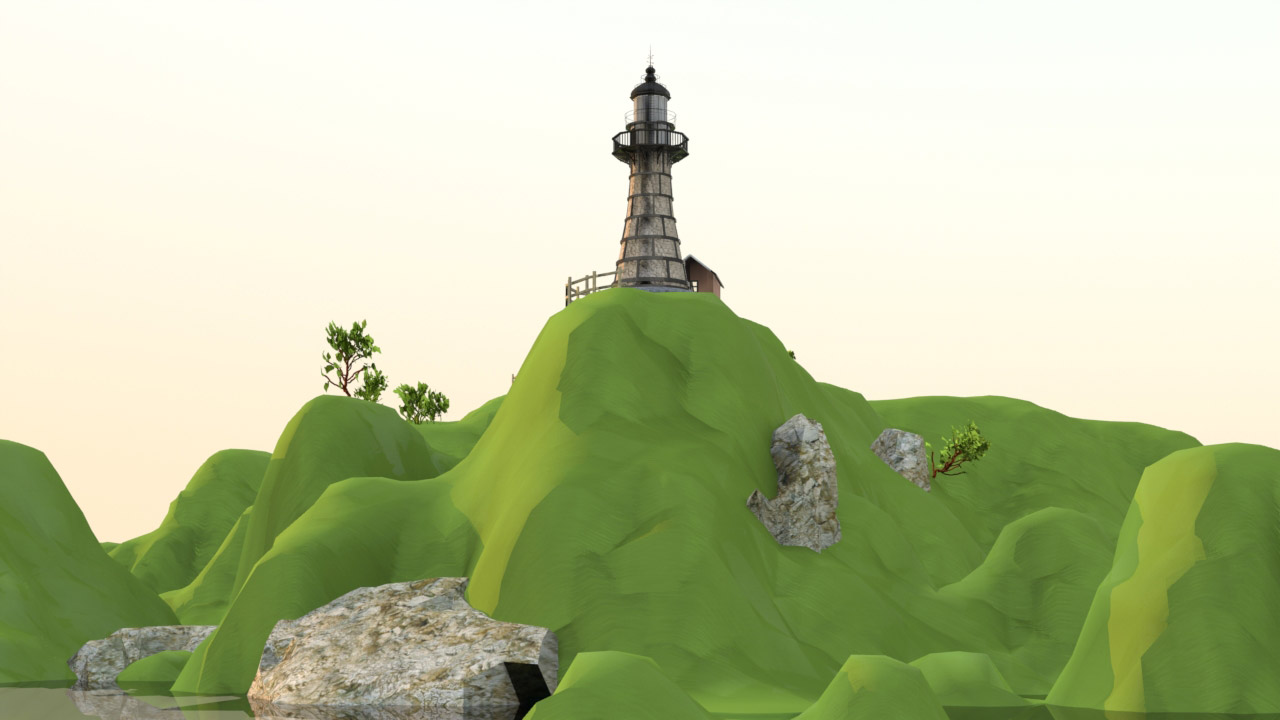
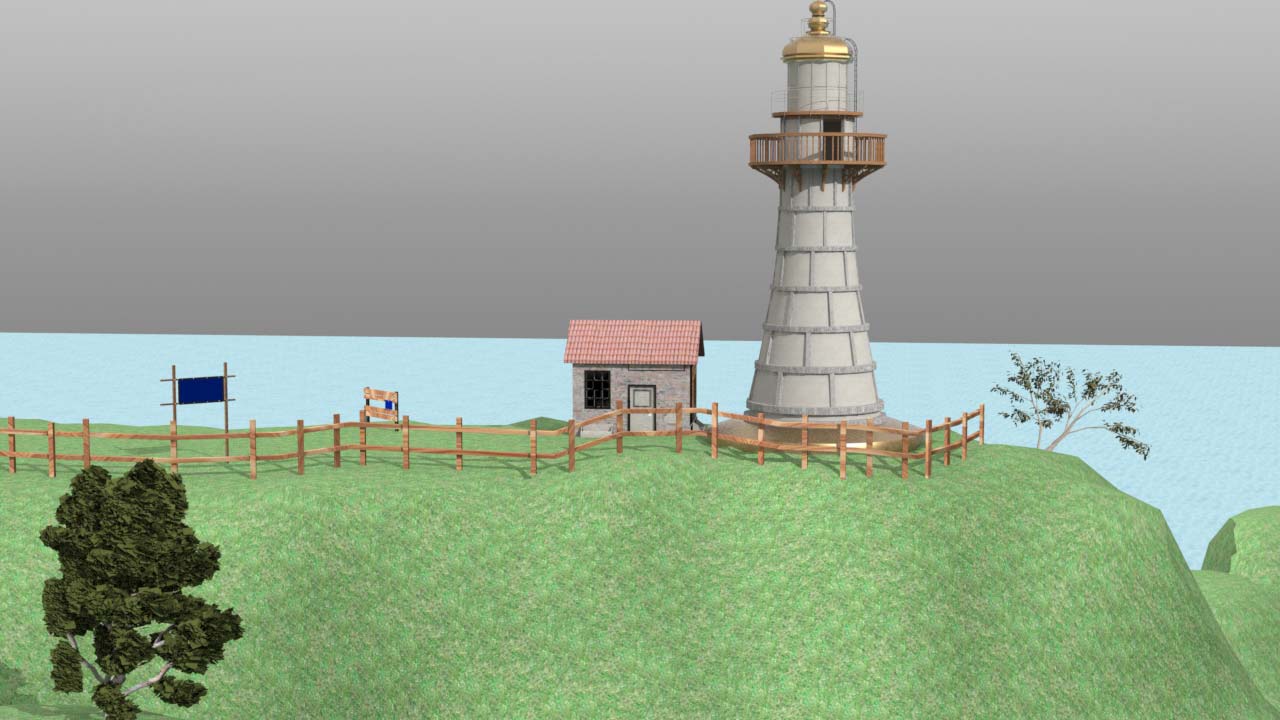
Examples of Successful Projects

Check out these awesome projects! The images below are examples of successful student projects. Use the following images to help guide you to your end results. Pay really close attention to the projection of the image map on to the flyer. We don't want to see any distortions on the image, so double check your projection settings in the Texture Locator.
 Timelapse Video of the Project
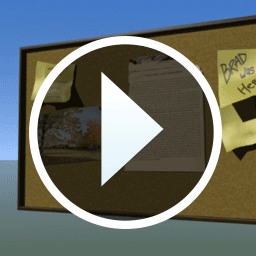 I've put together another Time-lapse video for this project. Applying materials and textures can be a challenge, so use this video as a visual reference guide on how to Apply Materials to your objects in the scene. Don't forget to Apply Image Maps on all of your geometry too! By the end of this project you'll have a fantastic looking render of a completed cork board!
All Finished with your Homework?

After you have saved the project file on your personal external storage device (like a thumb drive), please upload your Luxology Scene File (.lxo) and your rendered image (.JPEG) to the Cork Board Texture dropbox on D2L.
Before you upload your files to D2L, please ensure your files meet the following naming conventions:
Submit Your Assignment- lastname_gcom_402_corkboard_tex.lxo
- lastname_gcom_402_corkboard_tex.jpeg
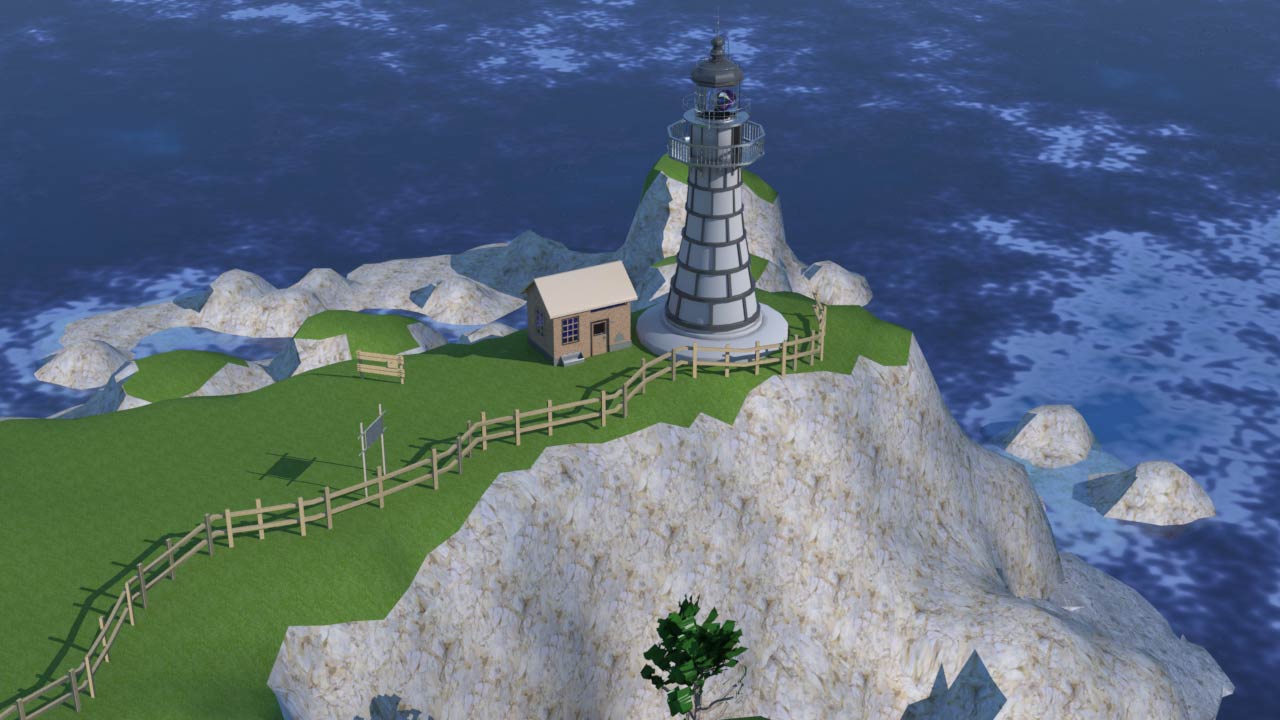
Lighthouse (25pts)

Project Due: Week 06
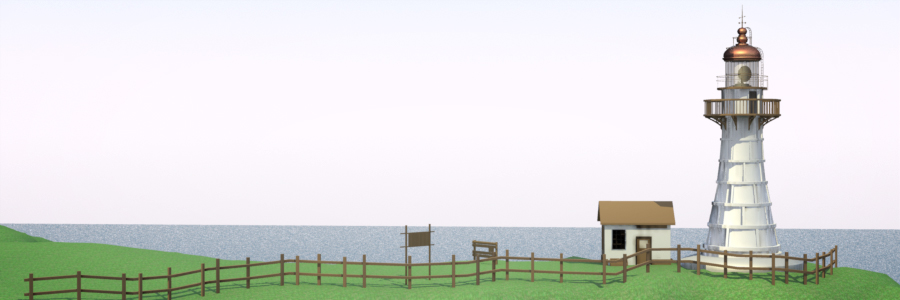
Using the provided model file of a Lighthouse, assign materials and texture to all of the polygons in the scene. Feel free to use the library of material presets that accompany Modo. Once you have created materials for all of the polygons in the scene, produce 2 renders of the scene from alternating angles. All renders must have a frame width of 1280 pixel and a frame height of 720 pixels.Please ensure your project includes the following required elements before you complete this assignment:
- Materials and Texture for all elements in the Lighthouse Scene
- Create 2 Renders of your scene from alternating angles
- Global Illumination = On
- Final Render Frame Size = 1280 x 720 pixels
- Final Render File Type = JPEG
Examples of Successful Projects
All Finished with your Lab Assignment?
After you have saved the project file on your personal external storage device (like a thumb drive), please upload your Luxology Scene File (.lxo) and your rendered image (.JPEG) to the Lighthouse dropbox on D2L.
Before you upload your files to D2L, please ensure your files meet the following naming conventions:
Submit Your Assignment- lastname_gcom_402_lab_lighthouse.lxo
- lastname_gcom_402_llab_lighthouse.jpeg
Important Documents

Check out these awesome learning resources! I've collected a number of assets that I think will help you conquer this week's homework and laboratory assignment. Please download the following materials to your local hard disk or flash storage device (AKA thumb drive).
Videos

Here are some important videos for this week's learning materials. I've created these videos to help you navigate the instructional content we covered in class. Make sure you add these important assets into your personal learning library by bookmarking them!