The Art of Product Design
 The state of 3D modeling and rendering technology has advanced to such a high level that it is now possible for commercial advertising firms to employ photo-real computer generated images in their advertising campaigns. In the past, it cost way to much to use photo-real images in advertisements and the technology was only really affordable for big budget film studios. Well, the times are a changing and computer generated 3D models are now part of every major advertising campaign (in one shape or another).
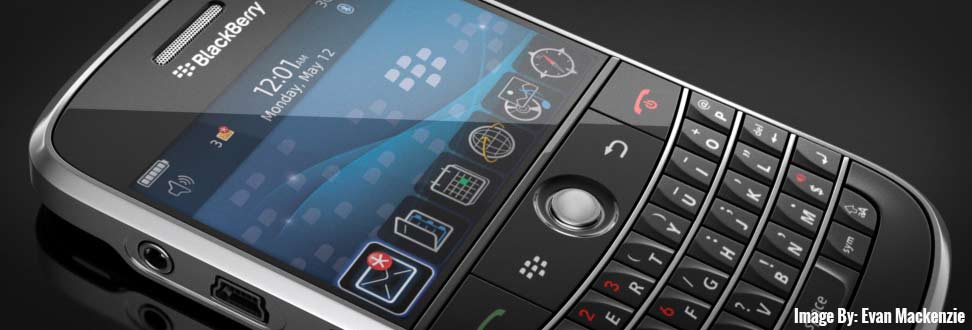
 Lets pretend, for a moment, that we are the creative director at a popular advertising agency. Our client has asked us to create a promotional campaign for a new, unreleased cell phone that will hit the store shelves in a few months. We need establish an entire library of visual images that we can use within this campaign, so we need generate high quality photographs and video of the product. Traditionally, we would have to hire a production studio, find a photographer to take the pictures and then hire a cinematographer to film the commercials. That's a lot of time, energy and money to just film the darn thing; we have't even done the graphic design and authoring yet! As you can see, there are a lot of steps in making a print campaign for a new product. This entire process is simplified with the inclusion of computer generated elements. Instead of hiring 10-15 people to film the commercial or take pictures of the product, our advertising agency needs to hire just one CG artist.
 This week, we are going to examine the art of product design and explore the production pipeline for creating models and renders that are suited for commercial work. During this process, we will learn more advanced modeling techniques ad focus a lot effort on re-creating accreting materials and textures for our models. We wrap up our conversation by exploring "Polygonal Flow" and the proper application of this important structural element.

Cell Phone - Geo (50pts)

Project Due: Week 12
In this project you will combine polygonal modeling techniques and sub-division surfaces to create a series of product shots for a new, yet to be released, Cell Phone. This model will be used as part of a commercial advertising campaign to launch the new phone.
Download reference images to help build your model. Establishing the proportions, polygonal flow and volume will be nearly impossible without using reference images. Use Photoshop, or any image editor, to cut up your reference photographs into orthographic images. Make sure you import these images into Modo as backdrops to help you with the modeling portion of this assignment. Please ensure your project includes the following required elements before you complete this assignment:
- Geometry for Cell Phone
- Geometry for Simple Scene
- References Images for (at the very least) the front and side of your cell phone
- Global Illumination = On
- Studio Preset = Yes!
- Final Render Frame Size = 1280 x 720 pixels
- Final Render File Type = JPEG

MODELING
- 10 Points - Perfect geometry that successfully captures an accurate shape of the object, no technical errors on the model. Clean, well designed geometry.
- 8 Points - Good geometric structure but needs work on establishing the correct form of the object.
- 6 Points - Satisfactory work that includes crossed polygons, duplicated geometry, poor construction practices and bad form.
- 4 Points - Below average model that includes more than 3 geometric issues that are influencing the form of the model.
- 2 Points - Poor job that includes 5 or more geometry issues that results in the unsuccessful construction of the object. Little or no effort put into the model.

TEXTURING
- 10 Points - High quality textures and materials that accurately represent the surface characteristics of the model; no distortions or warping.
- 8 Points - Cleanly recreated the surface of the object and included good image maps and textures.
- 6 Points - Image Maps and Materials barely describe the surface of the object and do not match the size, scale or proportions of the model. Lacks accuracy and definition.
- 4 Points - Low Quality textures and materials on the object. Noticeable projection issues that includes warping and distortions.
- 2 Points - Textures and Materials are applied incorrectly and the surface does not match the reference. Poor job on applying accurate materials.

RENDERING
- 10 Points - High Quality Render that includes the correct placements of lights and application of the GI system. Composition beautifully showcases the scene.
- 8 Points - Good composition and lighting set-up, but lighting and camera placement does not showcase the models in the scene.
- 6 Points - Average render that includes poorly positioned lights, inaccurate Global Illumination settings. Camera placement does not showcase the model.
- 4 Points - Does not include the assigned lighting set-up or inclusion of the Global Illumination system. Camera is not focused on the model.
- 2 Points - Poor render quality and that does not meet any of the assigned rendering requirements. Does not illustrate the model or scene.

CREATIVITY
- 10 Points - The artwork demonstrates original personal expression , goes above and beyond the requirements of the assignment. Perfect portfolio piece.
- 8 Points - The artwork demonstrates some personal expression and added a few extra elements that were not included in the assignment.
- 6 Points - The artwork demonstrates an good amount of personal expression and included a creative approach to the assignment.
- 4 Points - The artwork demonstrates little personal expression, problem solving skills and creative application of the tools.
- 2 Points - The student put forth no effort on the project; class time was not used well; did the bare minimum amount of work.
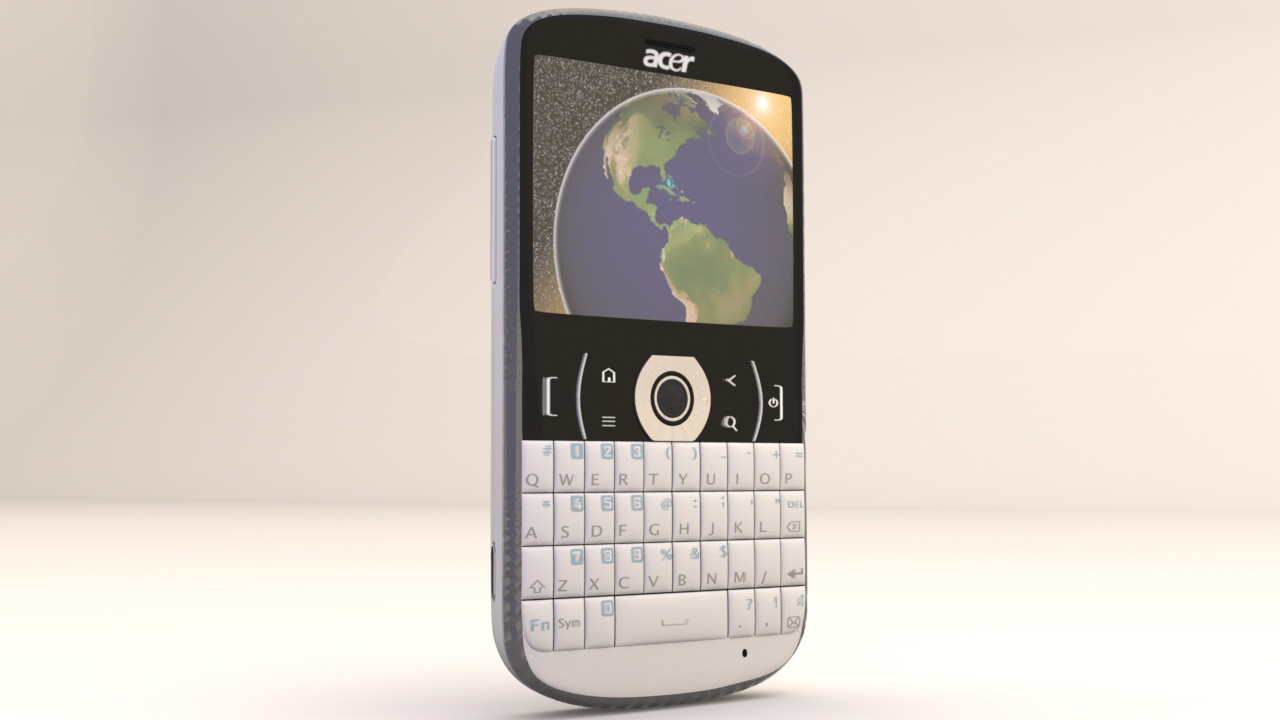
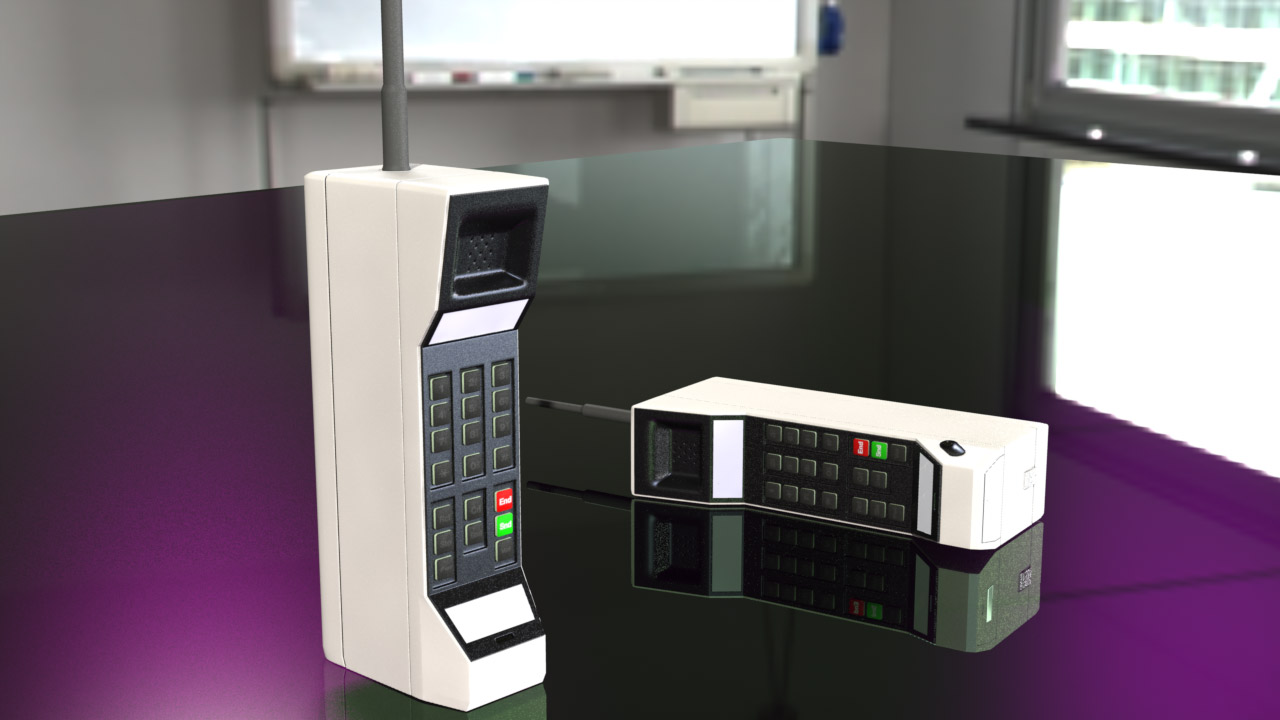
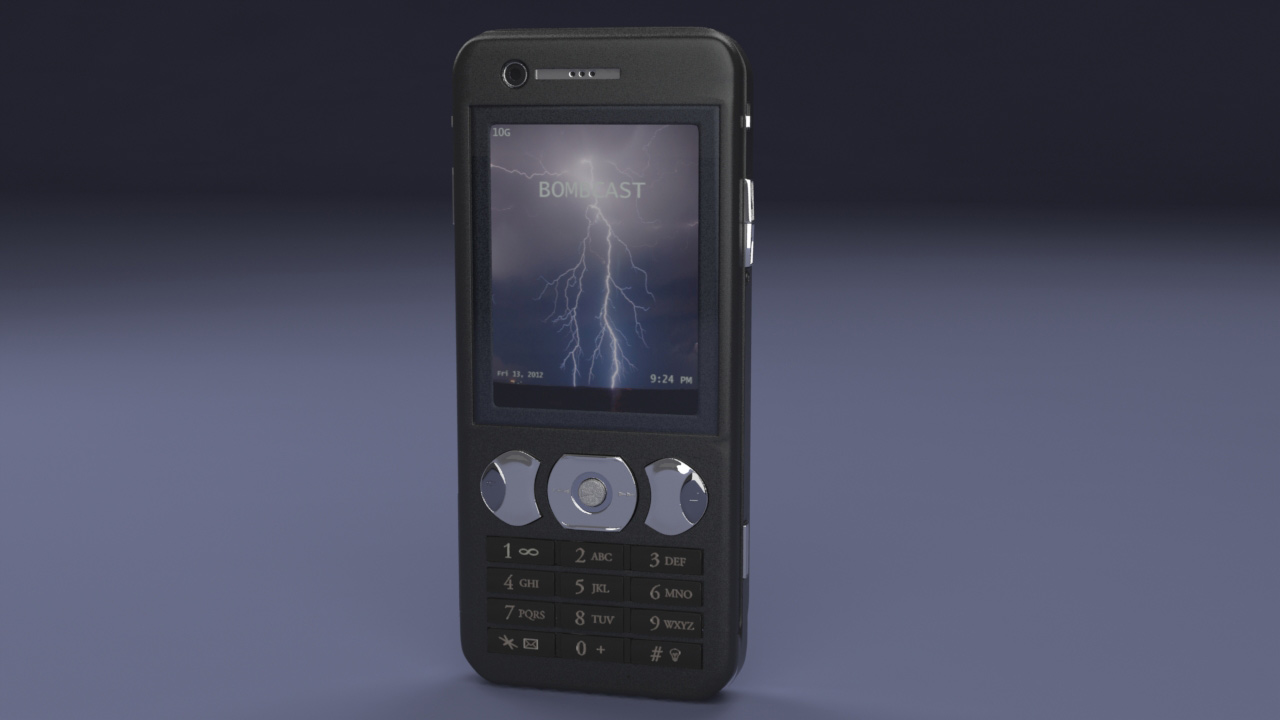
Examples of Successful Projects

Check out these awesome projects! The images below are examples of successful student projects. Use the following images to help guide you to your end results. The textures, materials and lighting on all of these projects really make these images shine!
All Finished with your Homework?

After you have saved the project file on your personal external storage device (like a thumb drive), please upload your Luxology Scene File (.lxo) and your rendered image (.JPEG) to the Cell Phone Geo dropbox on D2L.
Before you upload your files to D2L, please ensure your files meet the following naming conventions:
Submit Your Assignment- lastname_gcom_402_cell_phone_geo.lxo
- lastname_gcom_402_cell_phone_geo.jpeg
Alignment Lab (25pts)

Project Due: Week 12
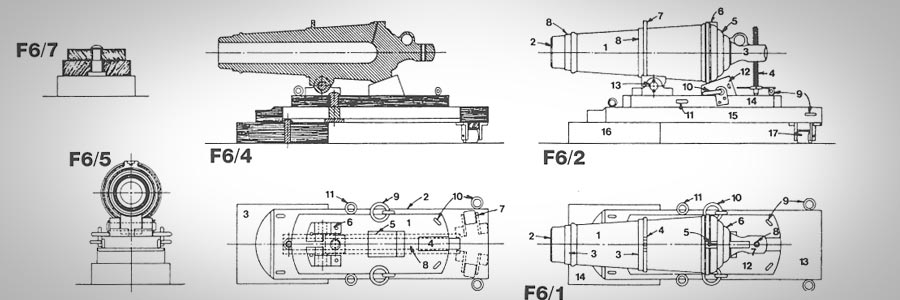
Using reference images in our 3D modeling pipeline is a must. The accuracy of our models sky rockets the moment we start modeling with reference images. Using the supplied reference images, correctly align 3 of the reference images in Modo. Place alignment planes to help you adjust the size and scale of the image to each other in Modo. Once you have successfully aligned all of the images to one another, test your alignment by flushing out the overall shape of the model with some very simple geometry.
All Finished with your Lab Assignment?
After you have saved the project file on your personal external storage device (like a thumb drive), please upload your Luxology Scene File (.lxo) and your rendered image (.JPEG) to the Alignment Lab dropbox on D2L.
Before you upload your files to D2L, please ensure your files meet the following naming conventions:
Submit Your Assignment- lastname_gcom_402_lab_alignment.lxo
- lastname_gcom_402_lab_alignment.jpeg
Important Documents

Check out these awesome learning resources! I've collected a number of assets that I think will help you conquer this week's homework and laboratory assignment. Please download the following materials to your local hard disk or flash storage device (AKA thumb drive).
Links

Here are some important links for this week's learning materials. Make sure you add these important assets into your personal library by bookmarking them!