Working with Layers
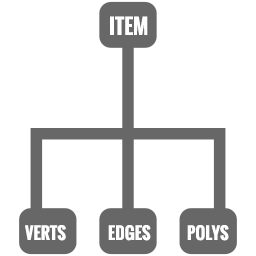 All 3D scenes are built around a two-tiered scene hierarchy of 3D elements that influences how we build, control and animate our models. The lower level of the scene hierarchy consists of the basic 3D components, Vertices, Edges and Polygons. The artist is considered to be working at the "Component Level" when creating, editing and manipulating Vertices, Edges and Polygons; or at Component Level. These 3D components are the basic building blocks of our model. All 3D objects are constructed with Vertices, Edges and Polygons. Manipulating these simple 3D components allows the 3D artist to create extremely complex shapes while only using simple tools.
The second level of the scene hierarchy is called the "Item Level" allow the artist to manipulate an entire object, or Item. At this level, you don't control individual vertices, edges or polygons, but interact with all of the connect polygons on a particular Item. Imagine your 3D model is a like a car. At the "component Level" you can move or edit the tires or the body, but at the "Item Level" you are only allowed to move or edit the entire car.
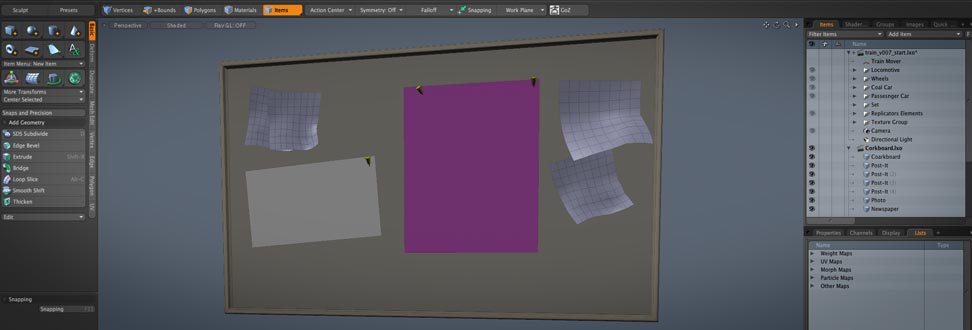
Most 3D scenes are comprised of a series of different 3D items. In Modo, we manipulate our 3D items in the Item List. During this week, we explore how to work with Items and how to effectively use the Item List when constructing complex scenes. By the end of our exploration, you'll have a stronger understanding of how Modo interprets Items and their role in the larger 3D modeling production pipeline.
Cork Board Geometry (50pts)

Project Due: Week 04
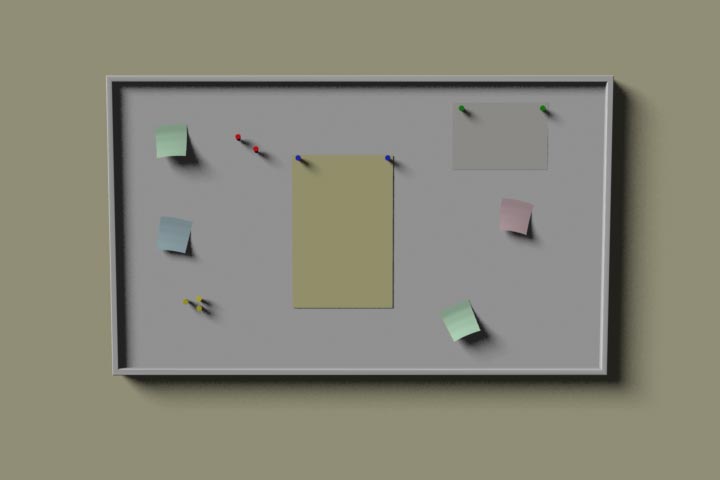
In this exercise, you will learn how to create, edit and manage multiple items in your Modo scene file. Complex 3D scenes are comprised of many different 3-dimensional items. Mastering the tools that manipulate, create and edit these 3D items is an important and critical skill for 3D artists. Using the tools we explored during the last exercise, you will model and render a realistic cork board for this assignment. Please follow the directions in Chapter 6 in the Unofficial Luxology Modo Guide for specific instructions on how to complete this assignment. Please ensure your project includes the following required elements before you complete this assignment:
- Geometry for Cork Board
- Geometry for at least 5 different paper flyers or posters
- Geometry for a wall or room
- Directional Light
- Global Illumination = On
- Final Render Frame Size = 720 x 480 pixels
- Final Render File Type = JPEG
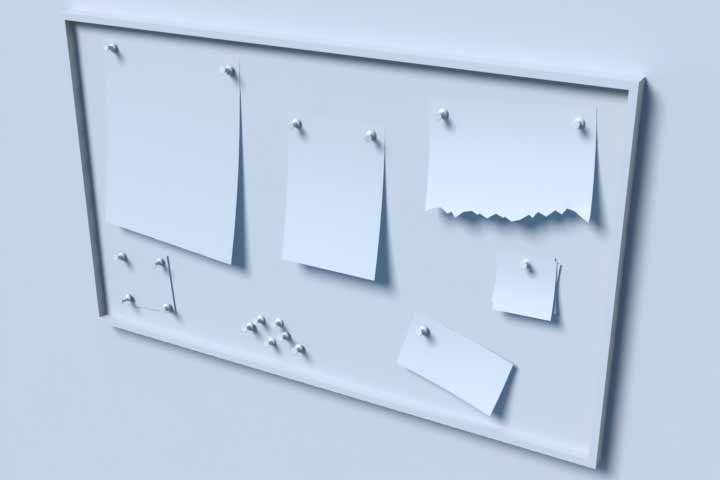
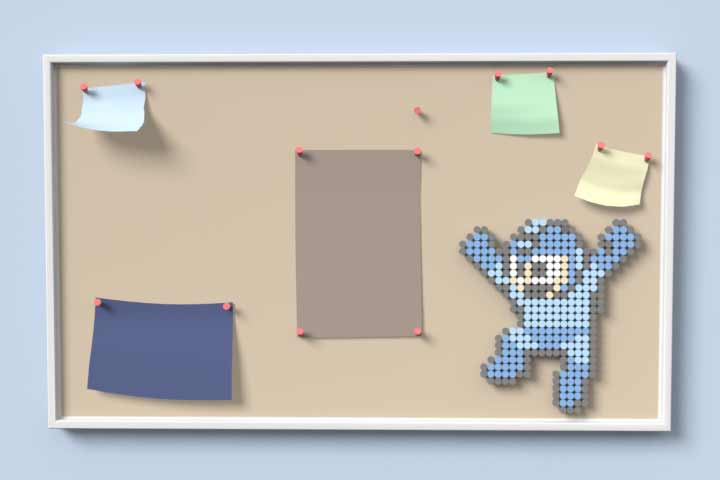
Examples of Successful Projects

Check out these awesome projects! The images below are examples of successful student projects. Use the following images to help guide you to your end results. One of the elements that make these projects successful was the artists attention to the form of the flyers. Look carefully and you'll see that the flyers, in some of these examples, are bent and crumpled. These details add the realism we're looking for in our models.
 Timelapse Video of the Project
 I've put together another Time-lapse video for this project. In this video, you'll see me quickly flushing out the form using the Bevel Tool. As you'll see in the video, I spend a lot of time establishing the size, scale and proportions of all of the elements in the scene. As modelers, we need to start "seeing" the world in simple shapes and understanding how those shapes fill their environment. Check out how I Clonned certain mesh items towards the end of the video. Awesome reference!
All Finished with your Homework?

After you have saved the project file on your personal external storage device (like a thumb drive), please upload your Luxology Scene File (.lxo) and your rendered image (.JPEG) to the Cork Board Geo dropbox on D2L.
Before you upload your files to D2L, please ensure your files meet the following naming conventions:
Submit Your Assignment- lastname_gcom_402_corkboard_geo.lxo
- lastname_gcom_402_corkboard_geo.jpeg
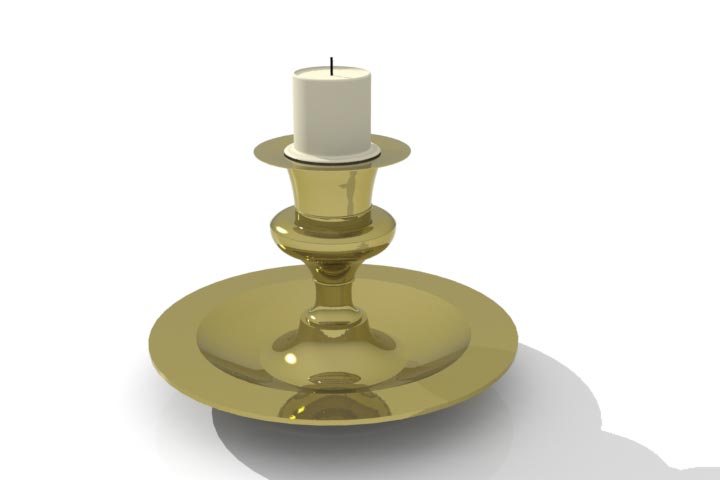
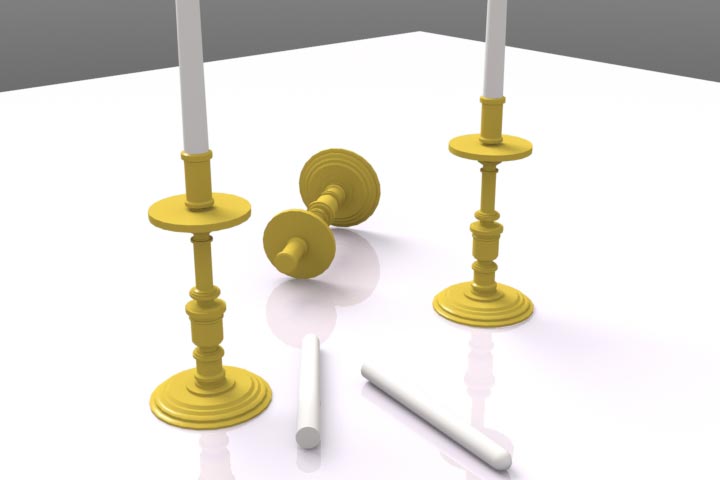
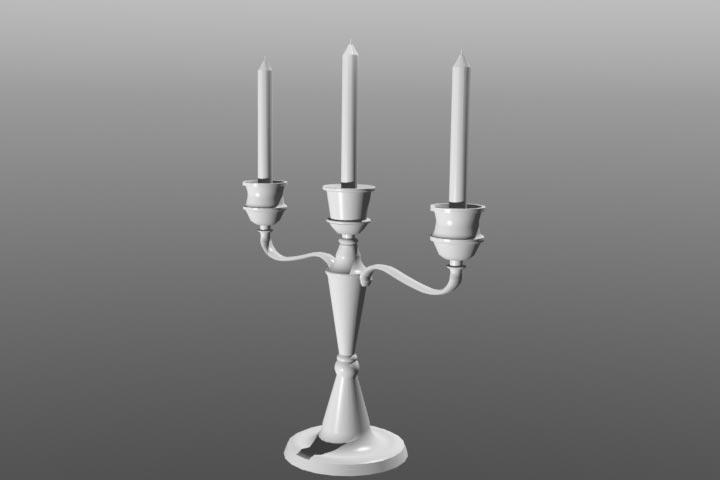
Creating a Candlestick

Project Due: Week 04
Assigning an edge profile to the Bevel tool can quickly add a lot of detail to your mesh. Using the tools we have learned in class, design, build and render a candlestick while using profiles. Research how a candlestick is supposed to look before you start modeling. You are free to choose how your candle stick will be design and built; just ensure you apply the Bevel Profiles in your final model.
Once you have completed modeling your candlestick take a moment and create simple scene for your candlestick to be placed on (like a desk or shelf). We are always looking for new and exciting ways to display our object. Its not enough to have a great model of a candlestick as we need to provide additional environmental cues to our audience. The inclusion of a background, or ground plane, will help the audience understand the size, scale and proportion of your candlestick. Lastly, add simple materials to the objects in your scene. Please ensure your project includes the following required elements before you complete this assignment:
- Geometry for Candle Stick
- Geometry for Candle
- Geometry for a Simple Scene
- Simple Materials for all elements in the Scene
- Global Illumination = On
- Final Render Frame Size = 720 x 480 pixels
- Final Render File Type = JPEG
Examples of Successful Projects
All Finished with your Lab Assignment?
After you have saved the project file on your personal external storage device (like a thumb drive), please upload your Luxology Scene File (.lxo) and your rendered image (.JPEG) to the Candlestick dropbox on D2L.
Before you upload your files to D2L, please ensure your files meet the following naming conventions:
Submit Your Assignment- lastname_gcom_402_lab_candlestick.lxo
- lastname_gcom_402_llab_candlestick.jpeg
Videos

Here are some important videos for this week's learning materials. I've created these videos to help you navigate the instructional content we covered in class. Make sure you add these important assets into your personal learning library by bookmarking them!