Baking Texture Maps in Modo
 As 3D modelers and artists, we are constantly striving to establish a sense of realism in our scenes. It doesn't matter if we are constructing a 3D scene of our local neighborhood or a 3D scene of a far-off distant planet, we should always being trying to recreate reality. One of the inherit challenges of working in 3D is creating objects that look "flat", void of any bumps or surface variations. Building these variations, however, can be a little challenge inside of Photoshop, so yo combat this issue we're going to be exploring the art of texture baking to extract 3D surface information from Modo.
It is really easy to construct a series of high-resolution meshes in Modo that contain accurate surface details, like dirt and grime. The Shader Tree, in Modo, allows us to quickly create a complex network of Material Groups and Item Masks that helps generate the "illusion" of the surface details on our model. The problem, though, is that these surface details only exist in the Shader Tree in Modo. Unfortunately, our game engine can't accept the parameters of the Shader Tree to generate the surface color of our models in Unity, so we need to rely on Image Maps (2D Texture Maps) to create the surface texture of our models. Texturing Baking allows us to extract surface detail on our models in Modo and save them in a series of texture maps. The process is a little tricky, at time, but the results is worth the effort. Instead of relying entirely on our image manipulation skills in Photoshop to generate the surface details on our 2D image map, we are going to incorporate baked texture information from Modo to supplement our texturing workflow.
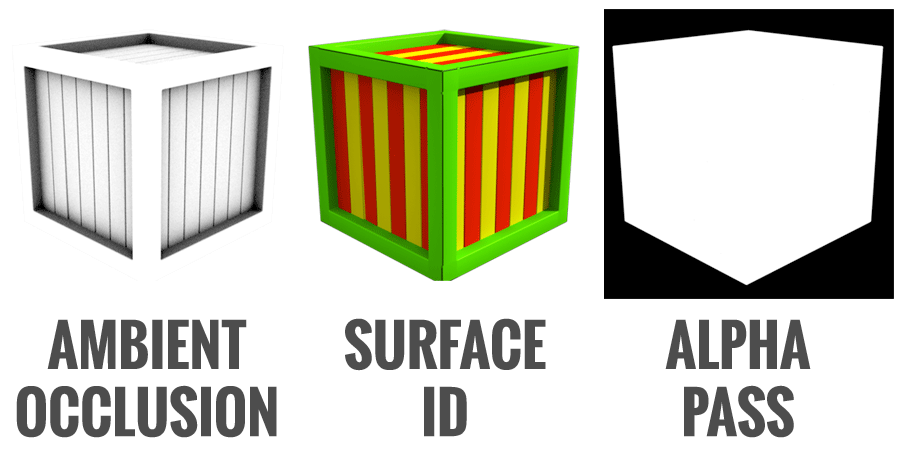
This week, we will be exploring how to bake texture maps from Modo. At the conclusion of the lecture, you'll be able to bake out a series of texture maps that will help you work more efficiently in Photoshop and add high-resolution texture information from the model in Modo. We'll be exploring the workflow for creating Ambient Occlusion, Surface ID and Alpha texture maps in Modo. Texture baking opens up a series of new possibilities and ultimately you are only limited by your creativity. Lets check out how to create baked texture maps in Modo!
Crates (50pts)

Project Due: Week 06
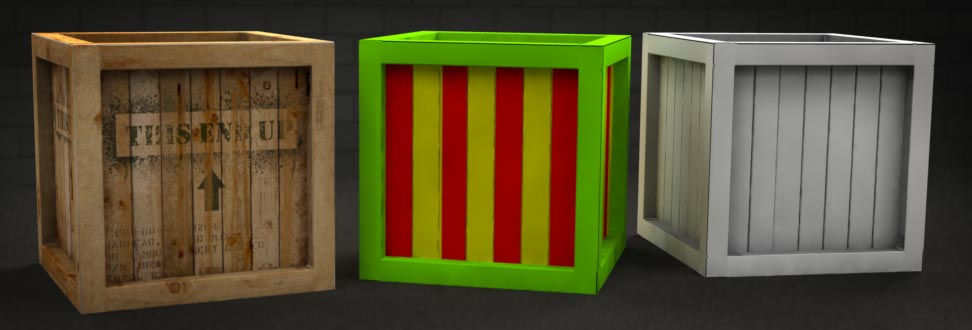
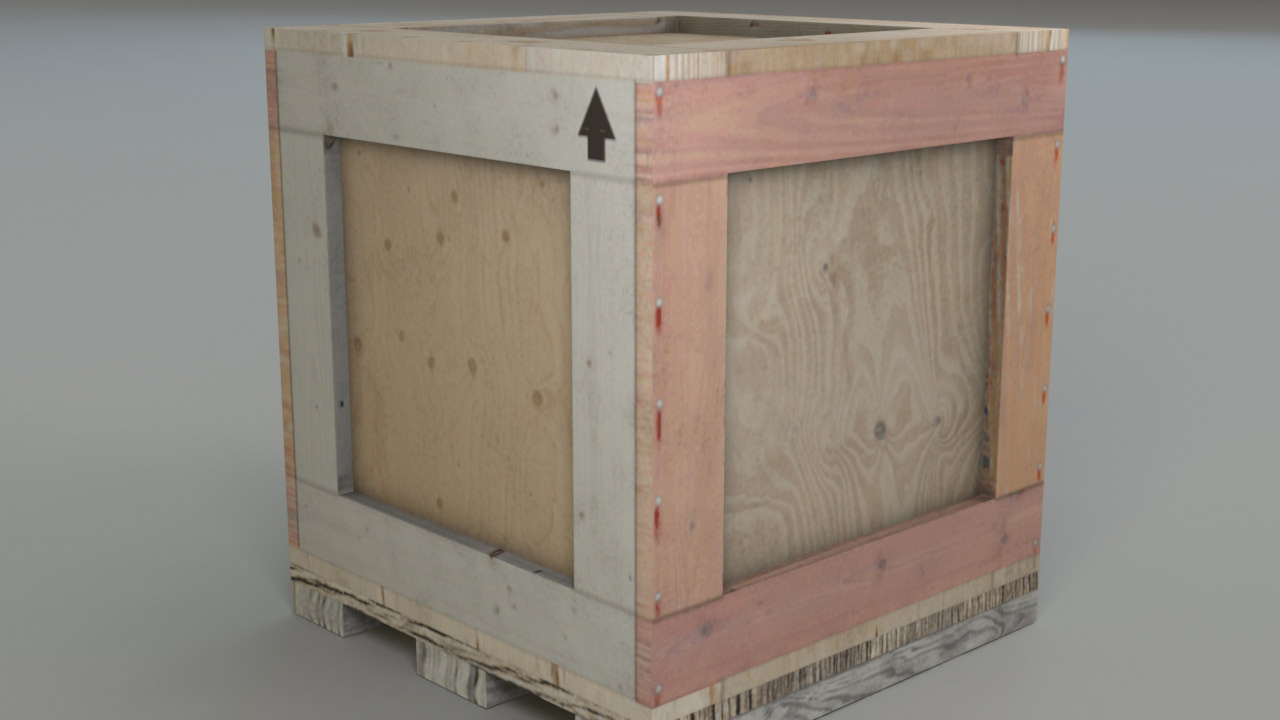
This week, we are going to be building 3 wooden crates. Each wooden crate should be different than the other crates in the scene. Each crate should be modeled separately on their own item within your Modo scene file. Remember, build your crate at the origin of the scene. We are starting to build a library of props for our game level, so each crate needs to be constructed independently from the rest. Don't forget to use reference images on this project. Building our models from photographs helps establish a sense of realism and authenticity. In addition to the construction of the models, you will also baking out an Ambient Occlusion, Surface ID and Alpha texture map from Modo. Once you have successfully extracted these maps from your Modo scene file than you can start painting your Diffuse Texture Map in Photoshop. Once you are finished, render the scene showcasing all three crates. Please ensure your project includes the following required elements before you complete this assignment:
- Geometry for Wooden Crate x3
- Geometry for a Set
- UV Maps for all Crates
- Diffuse Texture maps for all crates
- Ambient Occlusion maps for all crates
- Surface ID maps for all crates
- Alpha Maps for all crates
- Texture Resolution of all maps = 1024x1024
- Final Render Frame Size = 1280 x 720 pixels
- Final Render File Type = JPEG
Examples of Successful Projects
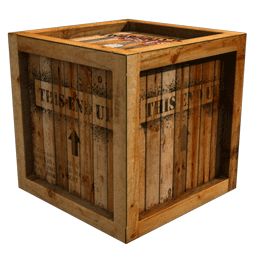
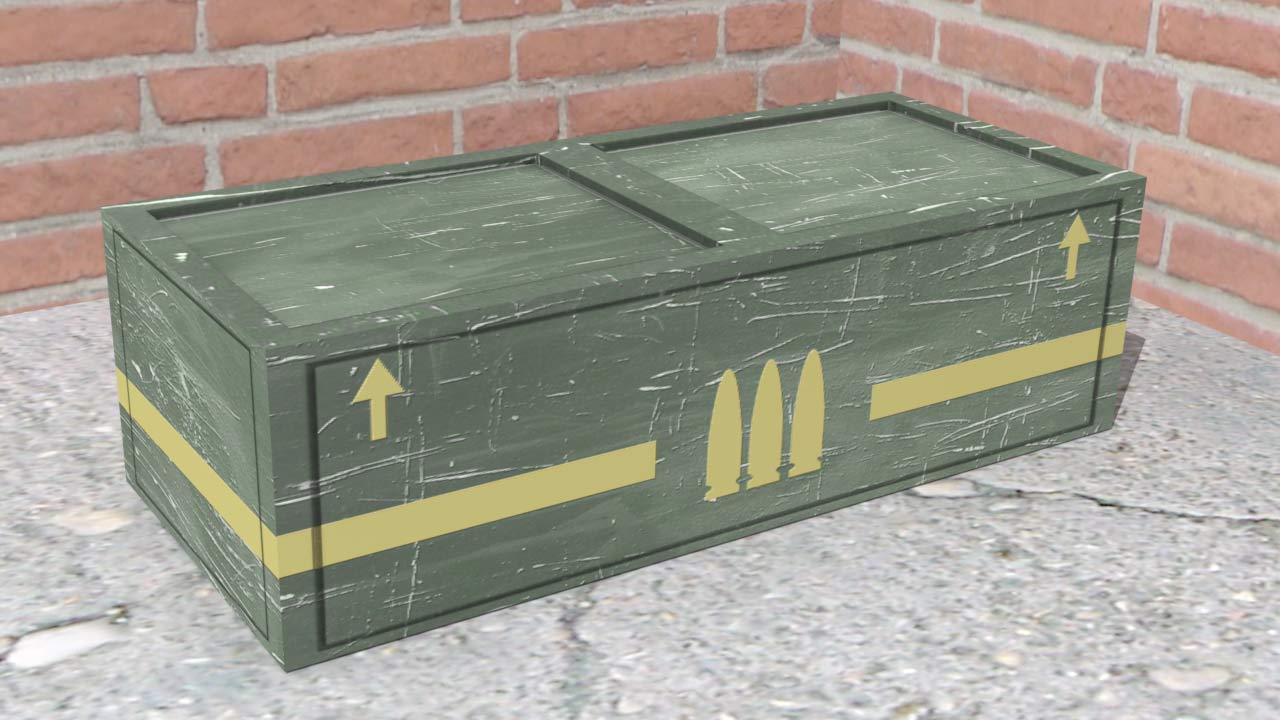
Check out these awesome projects! The images below are example of successful student projects. Use the following images to help guide you to your end results. Notice that all of these images include a high degree of detail on the surface of the geometry, accurate materials/textures, and stellar lighting set-ups. In addition, each of these images properly showcase the model, the focal point of the render, by utilizing a good sense of composition and framing. Great work!

All Finished with your Homework?

After you have saved the project file on your personal external storage device (like a thumb drive), please upload your Luxology Scene File (.lxo), a flattened PNG of your diffuse texture (.png) and your rendered image (.JPEG) to the Crates dropbox on D2L.
Before you upload your files to D2L, please ensure your files meet the following naming conventions:
Submit Your Assignment- lastname_gcom_424_crates.lxo
- lastname_gcom_424_crates.jpeg
- lastname_gcom_424_crates_tex01.png
- lastname_gcom_424_crates_tex02.png
- lastname_gcom_424_crates_tex03.png
Baking

Project Due: Week 06
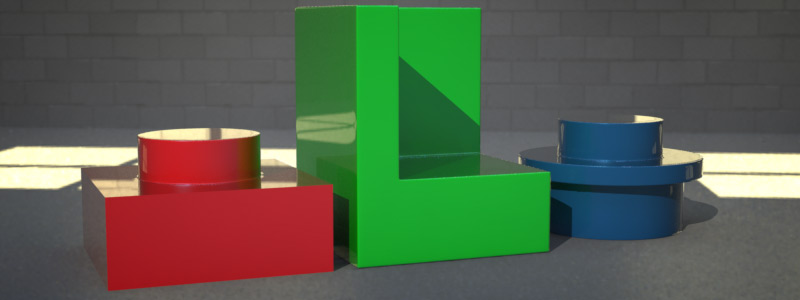
Generating high-quality textures can be a difficult process, but it is made a lot easier if you bake out texture information from Modo. In this lab exercise, you will explore the process of baking texture maps on a series of objects. Download the lab assets from the resource tab on this page. First, you must generate accurate UV maps for all of the 3D models and then bake Ambient Occlusion, Surface ID and Alpha Mask texture maps from Modo. Each model will generate 4 files: UV Map, Ambient Occlusion Map, Surface ID Map and Alpha Mask Map.
Create a new Photoshop Document that includes all four of these Modo generated elements. Make a simple Diffuse Texture map for each model that includes the illusion of soft shadows produced by the Ambient Occlusion map. Once you are done creating your Diffuse Texture Map in Photoshop, export your image map and apply it to your model in Modo. Generate a quick render that showcases your work and upload your files to the dropbox on D2L when you have completed this assignment. Please ensure your project includes the following required elements before you complete this assignment:
- UV Maps for all models
- Ambient Occlusion Maps for all models
- Surface ID Maps for all models
- Alpha Maps for all models
- Diffuse Texture Maps for all models
- Texture Resolution of all maps = 1024x1024
- Final Render Frame Size = 1280 x 720 pixels
- Final Render File Type = JPEG
All Finished with your Lab Assignment?
After you have saved the project file on your personal external storage device (like a thumb drive), please upload your your layered Photoshop document (.psd), your Luxology Scene File (.lxo) and rendered image (.JPEG) to the Baking Lab dropbox on D2L.
Before you upload your files to D2L, please ensure your files meet the following naming conventions:
Submit Your Assignment- lastname_gcom_424_lab_baking.lxo
- lastname_gcom_424_lab_baking.jpeg
- lastname_gcom_424_lab_baking_tex_01.psd
- lastname_gcom_424_lab_baking_tex_02.psd
- lastname_gcom_424_lab_baking_tex_03.psd
Important Documents

Check out these awesome learning resources! I've collected a number of assets that I think will help you conquer this week's homework and laboratory assignment. Please download the following materials to your local hard disk or flash storage device (AKA thumb drive).
Videos

Here are some important videos for this week's learning materials. I've created these videos to help you navigate the instructional content we covered in class. Make sure you add these important assets into your personal learning library by bookmarking them!