Duplicating Mesh Objects
Great 3D modelers are like great chess players; constantly thinking two or three steps ahead. The texturing stage of the 3D modeling production pipeline will directly influence how we construct the geometry of the model. This couldn't be more important when duplicating items, or even mesh components, in Modo. When you start building any part of your model, you should ask yourself "how am I going to texture this?". Use the answer to that question to better construct your model. We need to always be on the look-out for efficient production practices. Thinking two or three steps ahead of the game will ensure we are not duplicating any steps or doubling up on the amount of work we are doing.
In addition to looking for areas on our model that includes duplicate parts, we also need to pay close attention to the quality of the surfaces we are creating. Out here in the real world, the environment is going to influence how the surface of our meshes are going to look. Over time, erosion will slowly chip away at our surface and create little bumps, grooves and scratches on our surface of our model. As 3D modelers, we need to look to include these subtle changes in surface height in our models. Including these fine details into our texturing system will help our audiences understand how our models are going to look in the game engine. This process of creating surface relief, or height, is called a Bump Map and we're going to take a look at how to build these new maps types today.
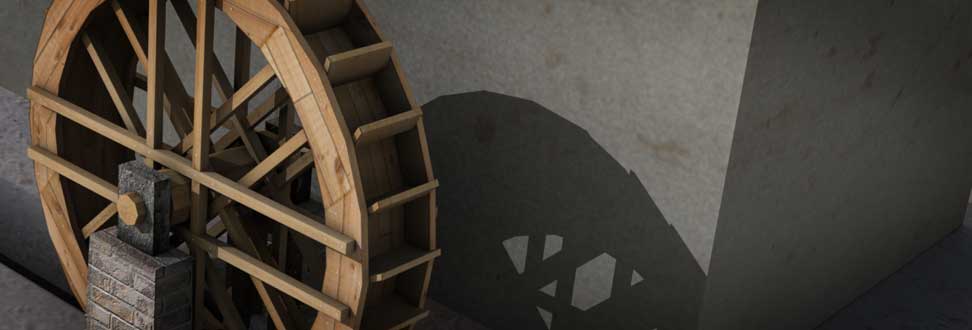
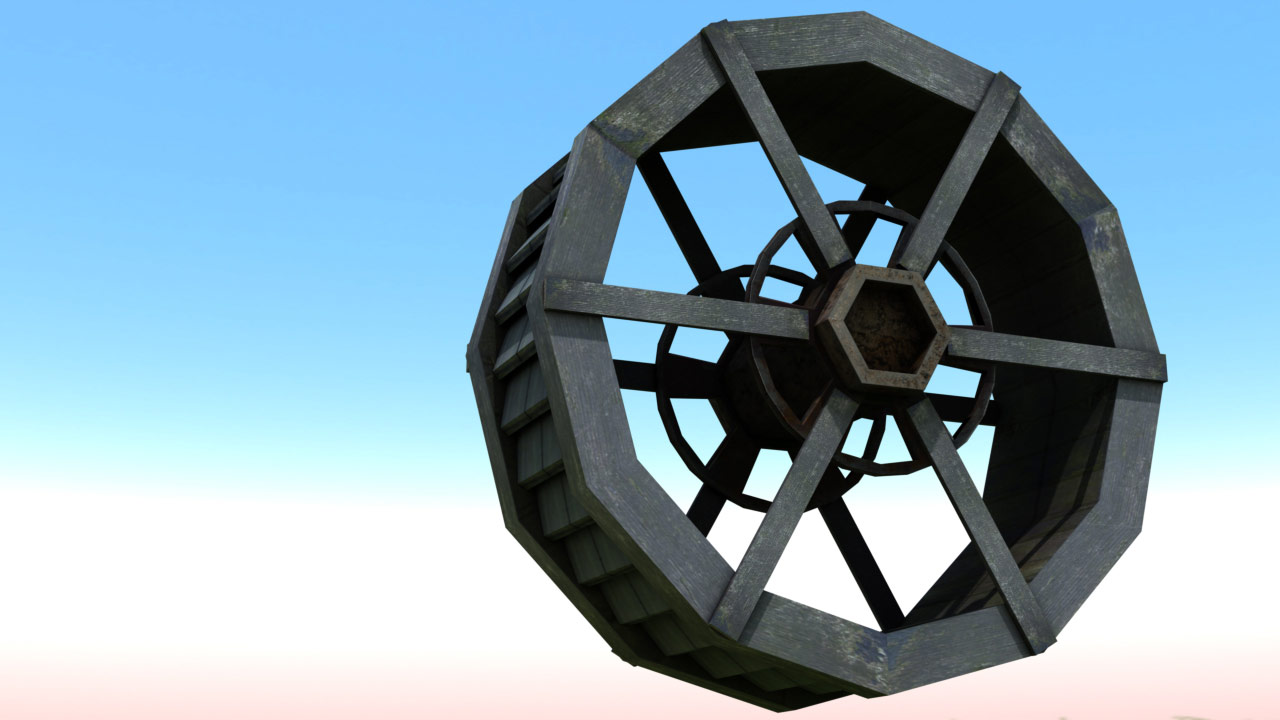
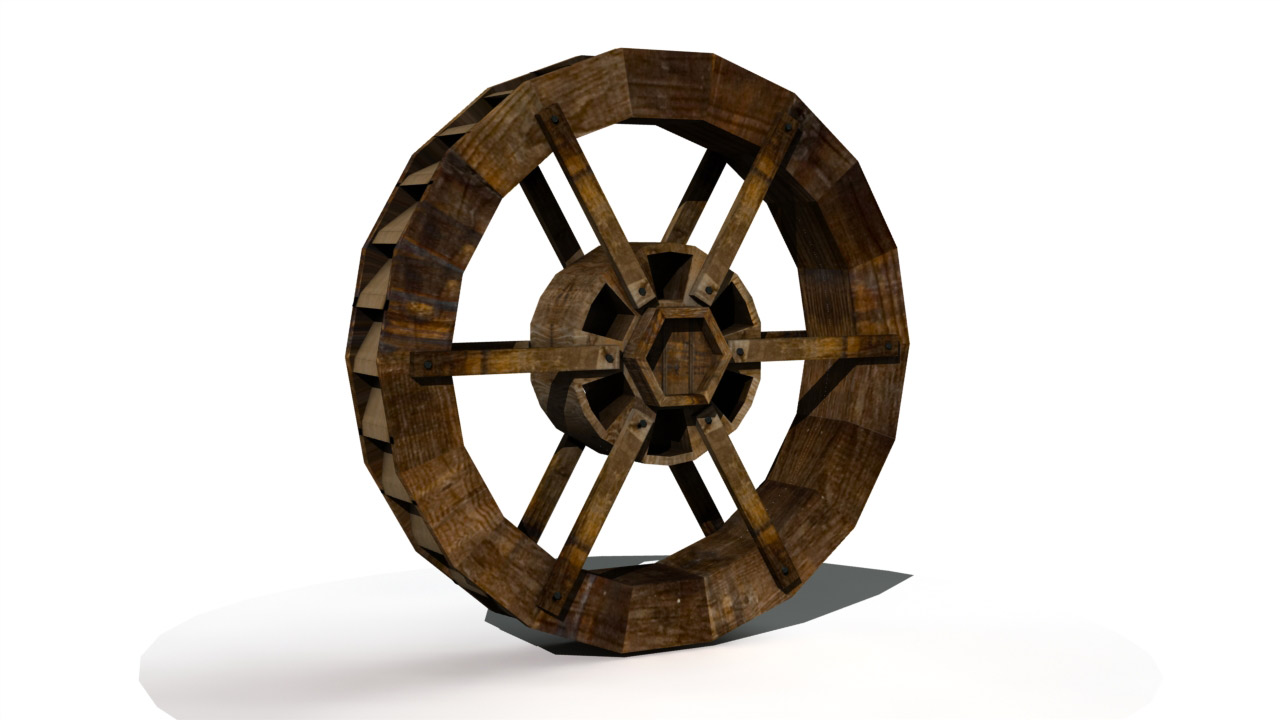
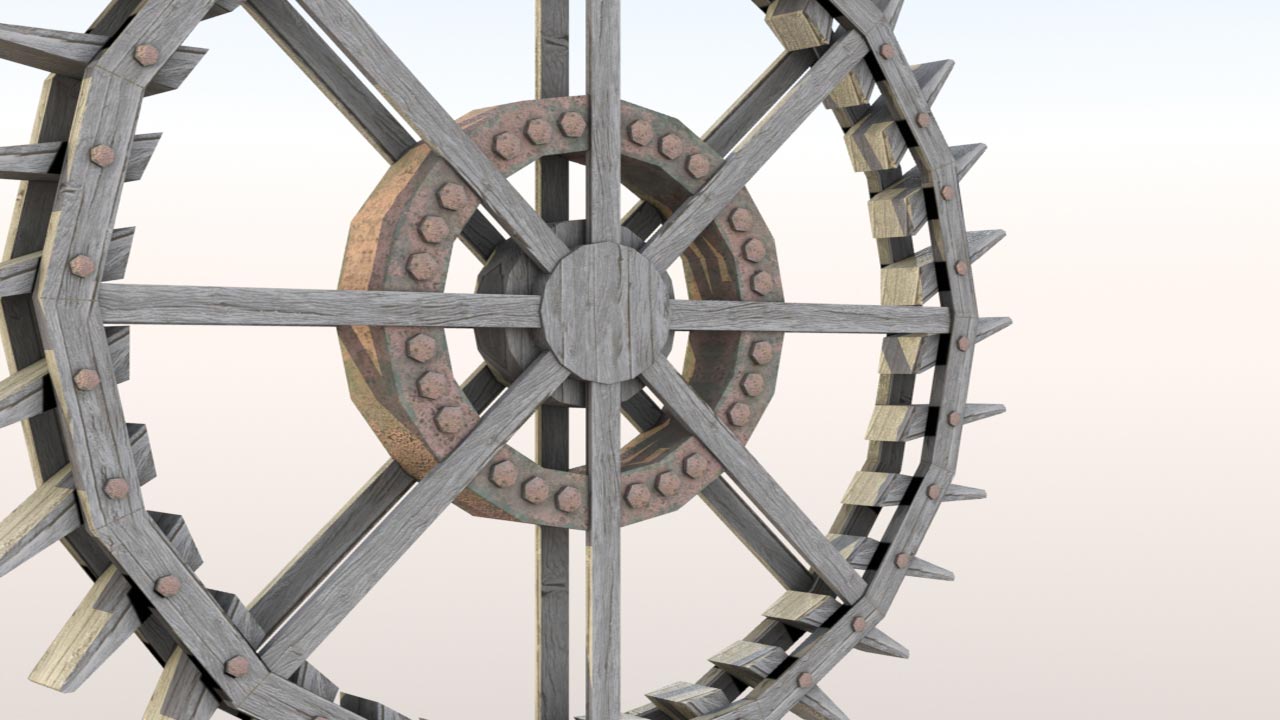
Water Wheel (50pts)

Project Due: Week 10
For this assignment, you will be putting your mesh duplication skills to test. Model, texture and render a photo-realistic Water Wheel using the basic Modo tool set. When creating complex 3D models or scenes, we are often asked to duplicate the same mesh components many times. This exercise will teach you the power of the duplication tools, replicators and the importance of UV Mapping when duplicating objects. By the end of the this project, you will have created an assets that you can use in your next project; the Blacksmith Shop.
Don't forget to research the object first and use photo reference images as the foundation for every modeling decision you make. This object will be inserted into a real-time rendering environment (AKA - a game engine), so look for ways to optimize your scene and save polygons. Please ensure your project includes the following required elements before you complete this assignment:
- Mesh Item - Water Wheel Base
- Mesh Item - Wheel Spokes
- UV Maps for all items
- Diffuse Texture Map
- Bump Texture Map
- Ambient Occlusion Texture Map
- Surface ID Texture Map
- Global Illumination = ON
- Final Render Frame Size = 1280 x 720 pixels
- Final Render File Type = JPEG
Examples of Successful Projects
Check out these awesome projects! The images below are example of successful student projects. Use the following images to help guide you to your end results. Notice that all of these images include a high degree of detail on the surface of the geometry, accurate materials/textures, and stellar lighting set-ups. In addition, each of these images properly showcase the model, the focal point of the render, by utilizing a good sense of composition and framing. Great work!
All Finished with your Homework?

After you have saved the project file on your personal external storage device (like a thumb drive), please upload your Luxology Scene File (.lxo), a flattened PNG of your diffuse texture (.png), a flattened PNG of your Bump texture (.png) and your rendered image (.JPEG) to the Water Wheel dropbox on D2L.
Before you upload your files to D2L, please ensure your files meet the following naming conventions:
Submit Your Assignment- lastname_gcom_424_water_wheel.lxo
- lastname_gcom_424_water_wheel_tex_dif.png
- lastname_gcom_424_water_wheel_tex_bmp.png
- lastname_gcom_424_water_wheel.jpeg
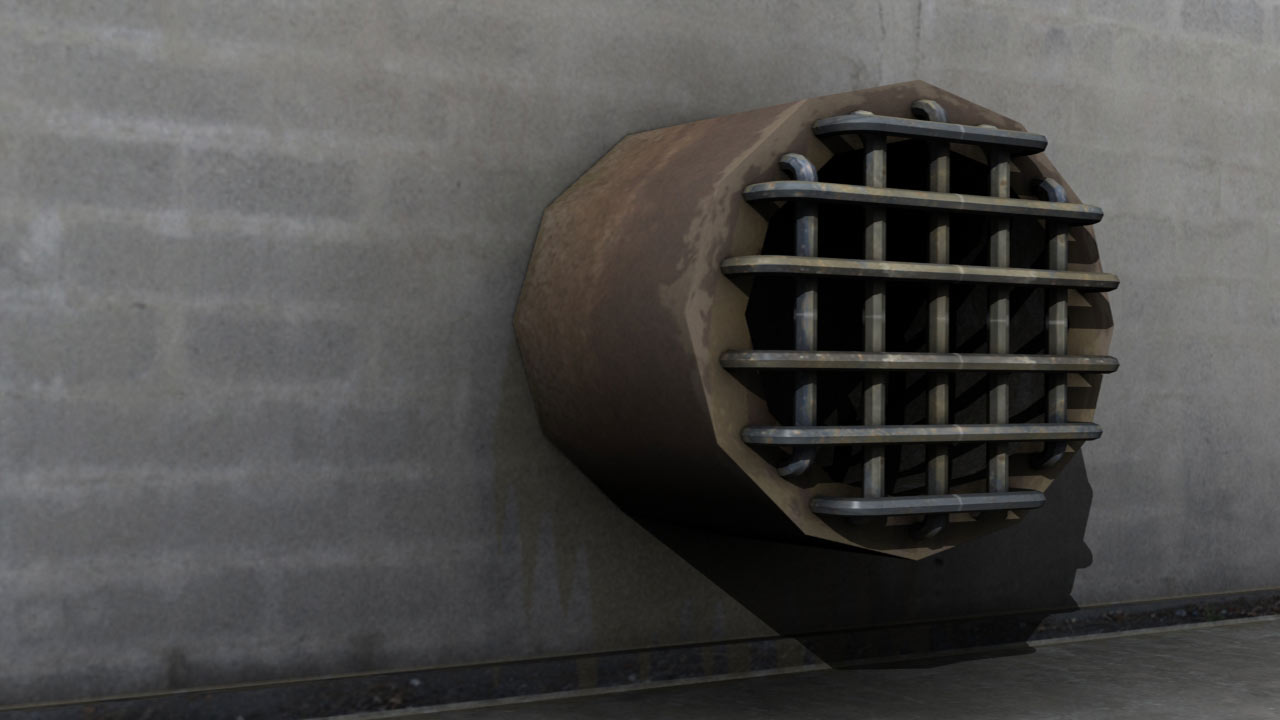
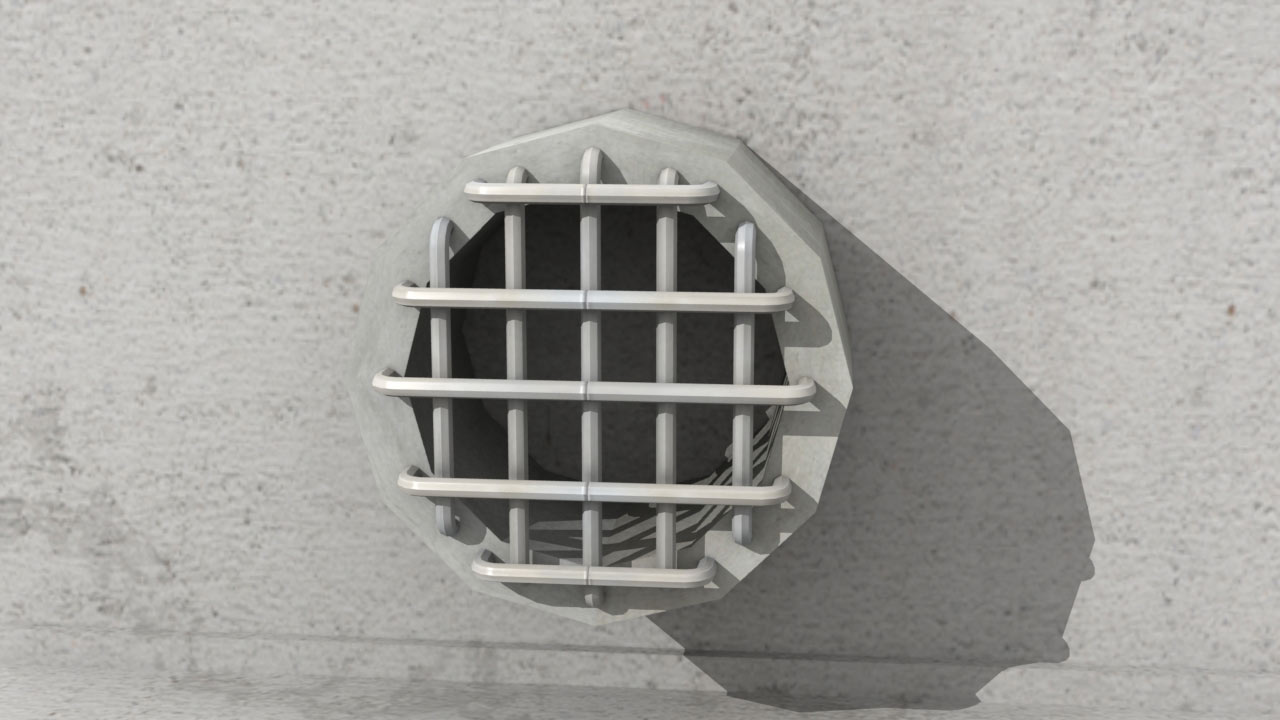
Drainage Pipe (25pts)

Project Due: Week 10
At some point in the production of a 3D model, you will have to duplicate an item or mesh component. Did you know that UV maps (specifically the UV islands) will also be duplicated? For this exercise, you will create UV maps and texture for the supplied model. Check out the sample image, though. The bars across the drain pipe need to be duplicated a number of times. Make sure you create UV maps before you duplicate. Once you are done, upload your project file and rend to D2L. Please ensure your project includes the following required elements before you complete this assignment:
- UV Map (islands) for all mesh items
- Diffuse Texture
- Final Render Frame Size = 1280 x 720 pixels
- Final Render File Type = JPEG
Examples of Successful Projects
Check out these awesome projects! The images below are example of successful student projects. Use the following images to help guide you to your end results. Notice that all of these images include a high degree of detail on the surface of the geometry, accurate materials/textures, and stellar lighting set-ups. In addition, each of these images properly showcase the model, the focal point of the render, by utilizing a good sense of composition and framing. Great work!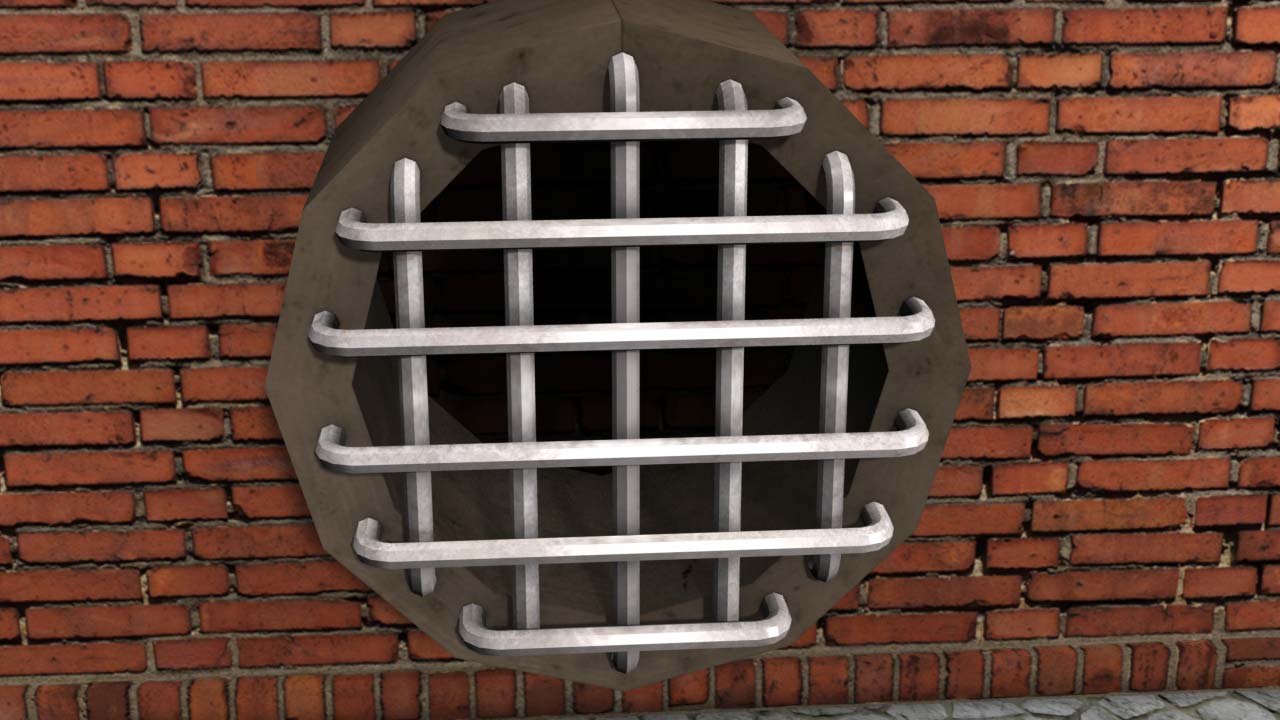
All Finished with your Homework?
After you have saved the project file on your personal external storage device (like a thumb drive), please upload your Luxology Scene File (.lxo), and your rendered image (.JPEG) to the Drainage Pipe dropbox on D2L.
Before you upload your files to D2L, please ensure your files meet the following naming conventions:
Submit Your Assignment- lastname_gcom_424_lab_drain_pipe.lxo
- lastname_gcom_424_lab_drain_pipe.jpeg
Important Documents

Check out these awesome learning resources! I've collected a number of assets that I think will help you conquer this week's homework and laboratory assignment. Please download the following materials to your local hard disk or flash storage device (AKA thumb drive).
Videos

Here are some important videos for this week's learning materials. I've created these videos to help you navigate the instructional content we covered in class. Make sure you add these important assets into your personal learning library by bookmarking them!
Modeling
Texturing
Rendering